If you have been working with Drupal for a while you realize that by default it has many deficiencies, luckily, these deficiencies can be solved thanks to the community contributed modules that extend this wonderful CMS, achieving practically the impossible.
This time we are going to talk about config split, a module that you have available on the official page in drupal.org. This module mainly extends the functionality of the configuration synchronization with the main feature of adding the "Environments" system with which we can make a module only installed locally among other things.
Module installation
To install it is as simple as requiring it in our composer using the following command.
composer require drupal/config_split
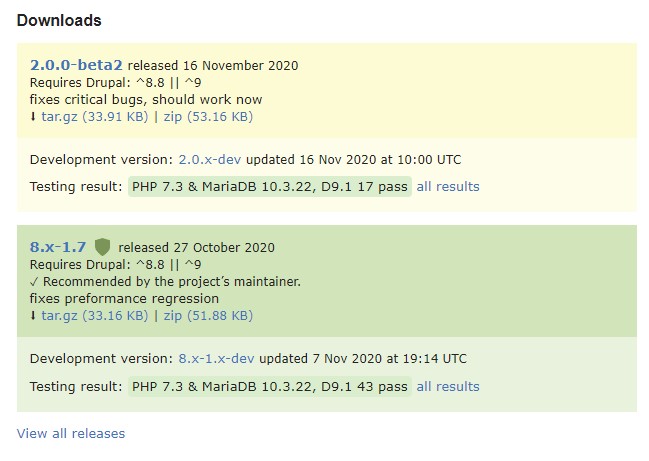
The current version that is stable and available today is 8.x-1.7
As soon as the module has been required we can activate it using the following command
drush en config_split
From this moment we have our module installed and we can start configuring it.
Module configuration
Once the module is installed, we can go to the Configuration section of our environment and the following will appear.
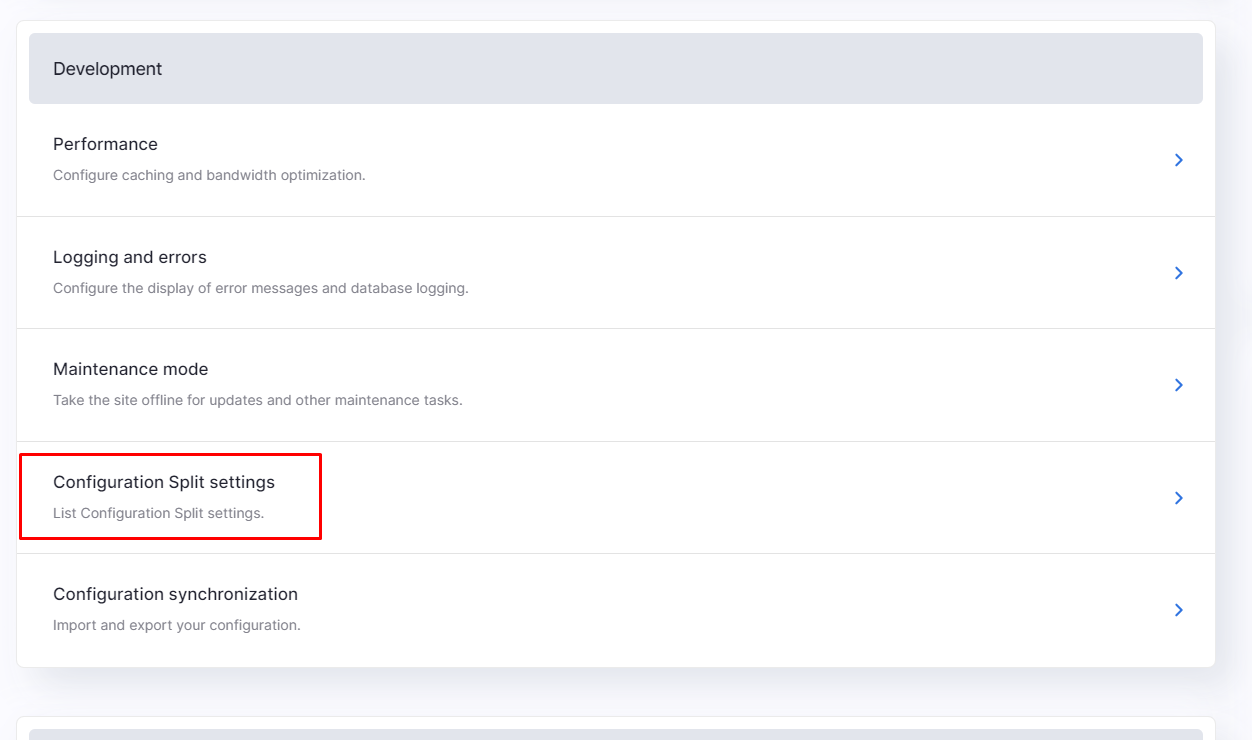
The page will show a list of the environments that we have created, at the beginning this list will be empty and we will have to proceed to create an environment.

In our case we are going to create the "Local" environment with which we will establish several modules as exclusive use of the local environment.
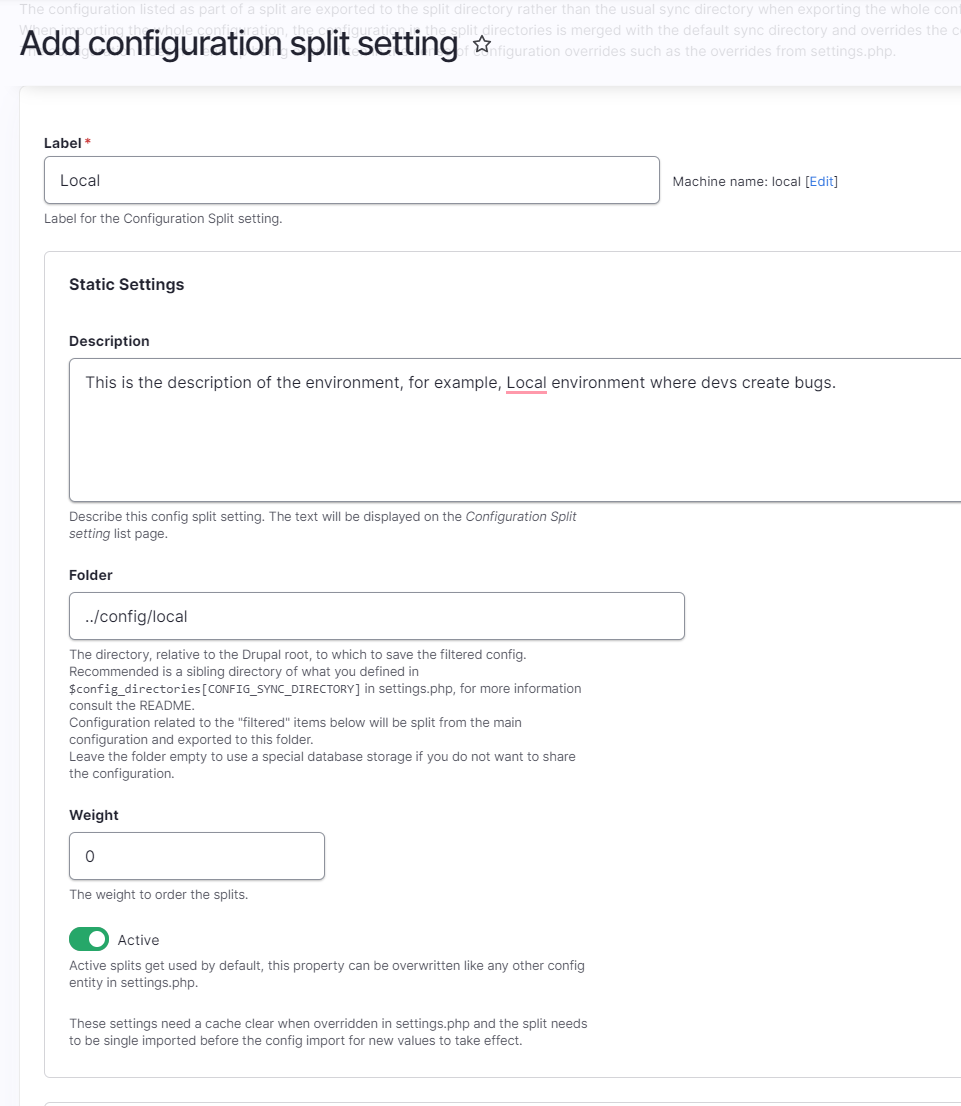
As you can see we have established a title, description, and the location of the folder where the YML corresponding to the local environment will be stored.
We will need to have the folder previously created, otherwise it will tell us that we have to make sure that the folder exists and has write permission.
Once this step is done, we will go to the most important section of the module, the configuration of the "local" environment.
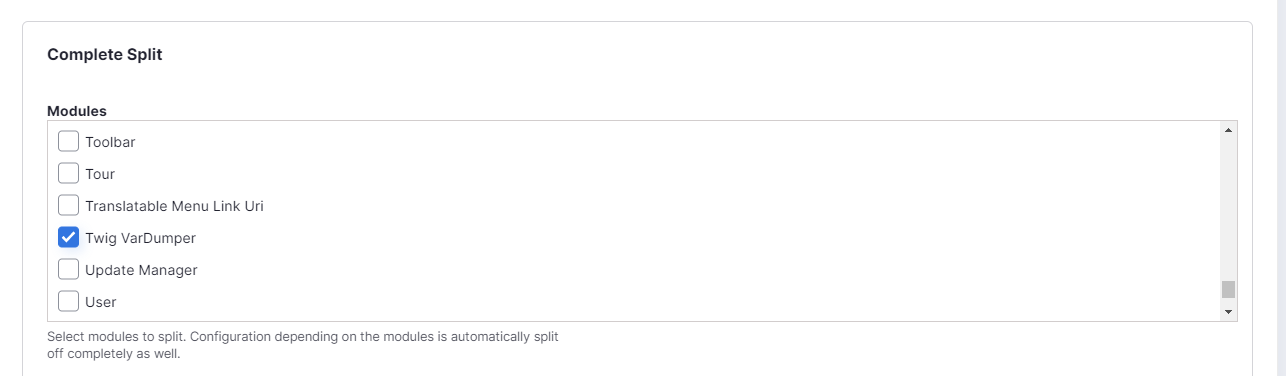
Complete split
First of all, we are going to see the "Complete Split" section which means that everything that is selected in this section will be removed from the config/sync folder and will be copied to the relevant environment folder, this is very useful if certain configuration we don't want them to exist by default in the environment unless we are in the "local" environment.
First, we have a list of all the modules that we have installed in our Drupal, in this list we must select the modules that will only and exclusively be installed in this environment. In our case, we are going to add the "Twig VarDumper" module since it is a module that we only use when we are developing.
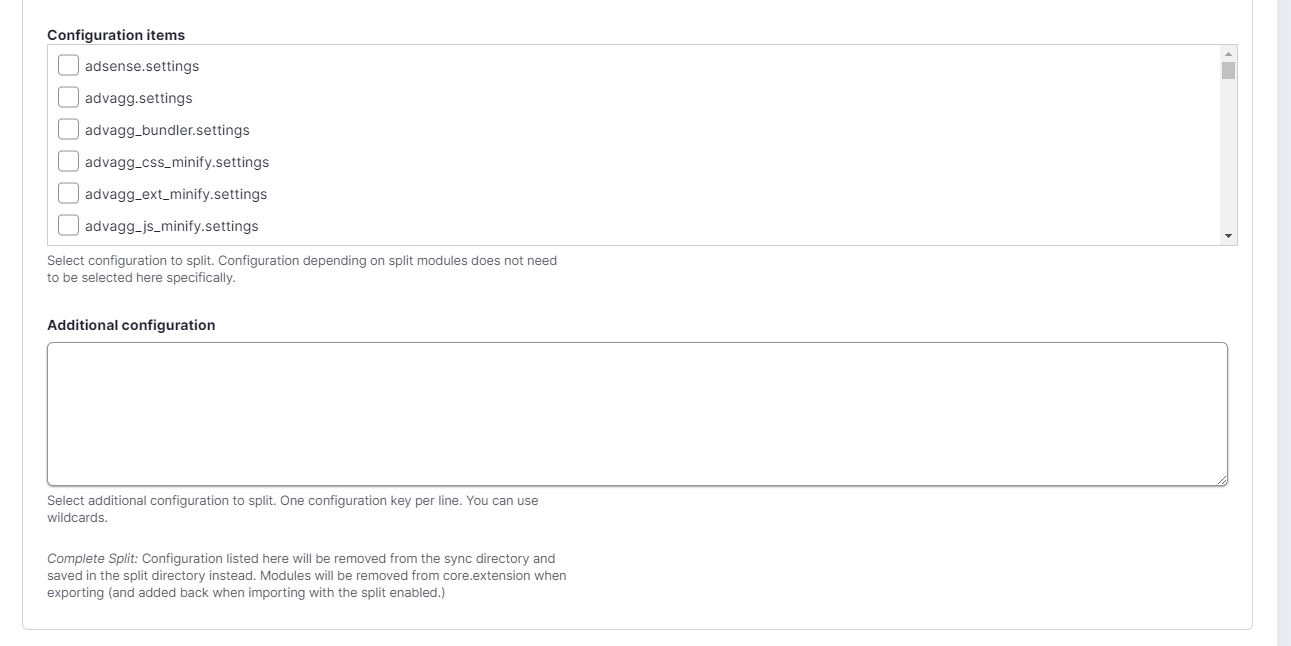
Within the same section we have a second section with the YML configuration which shows us a complete list of all the YML that we have available and if this is not reflected or we prefer to use "wildcards" then we have a text field to be able to use it.
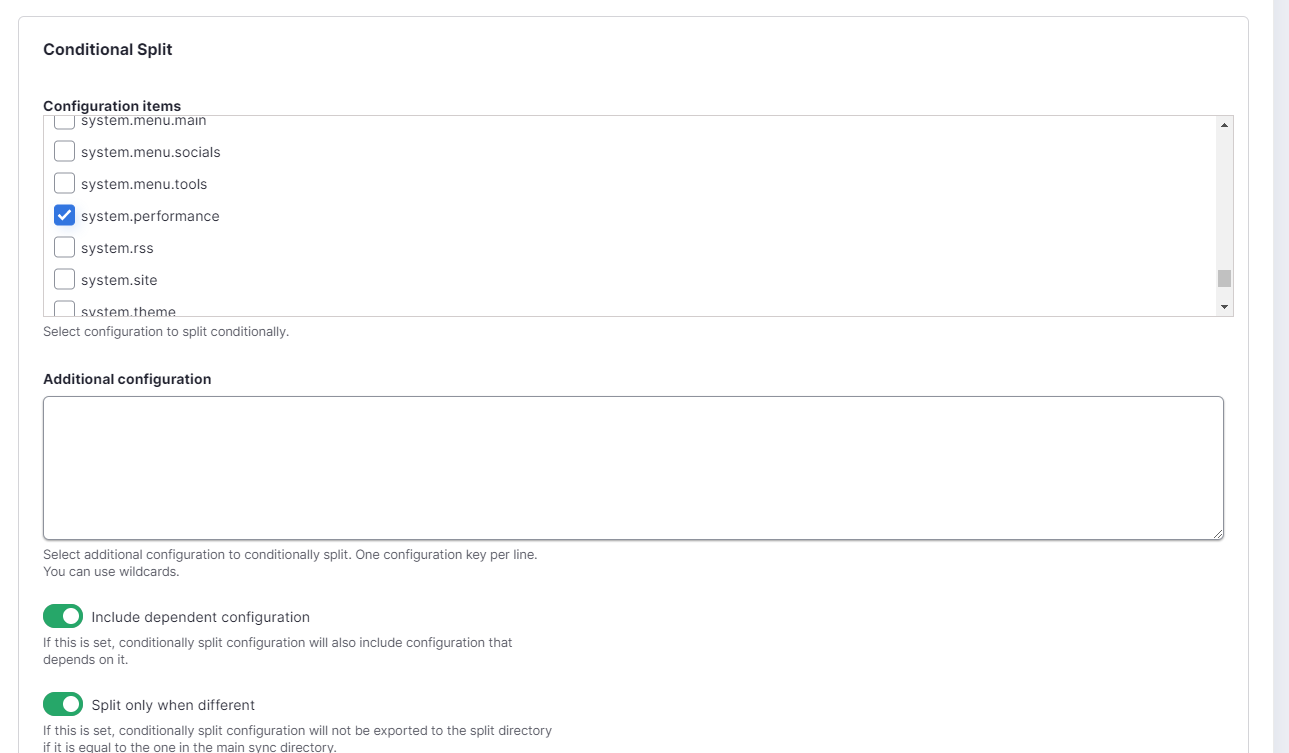
Conditional split
On the other hand we have the "Conditional split" this section is the one that I use the most since I like to have in the sync folder all the information by "default" so that the environment can be deployed without having to be in a specific activated environment With this method, we will only include the difference in the corresponding folder if it exists.
One of the most famous configurations to use is the performance file, a file in charge of telling drupal if the CSS and JS are minified or not, normally in local we must have it deactivated to be able to work and in other environments have it activated.
For the aforementioned example, we must add the system.performance files in the Configuration items section. This means that in the config/sync folder we must have the file with the minified activated and later in the "local" folder we will have it deactivated.
Once the configuration is finished, we need to tell Drupal in which environment we are working on, in this case we will add it in a simpler way. We edit the settings php and we add the following line
$config['config_split.config_split.local']['status'] = TRUE;
In some of our environments that we have different states this is how it looks.
$config['config_split.config_split.local']['status'] = TRUE;
$config['config_split.config_split.dev']['status'] = FALSE;
$config['config_split.config_split.staging']['status'] = FALSE;
$config['config_split.config_split.pro']['status'] = FALSE;
We can make this a little bit more complex adding some logic to take into account the domain where we are located, there are a lot of php variables that we can use to achieve this.
After updating the settings.php file, we will simply have to use the export command "drush cex" which will update several files, including the following.
- core.extensions: The twig vardumper module will stop activating in environments other than the local one.
- system.performance: The file will be created in the local folder with the settings disabled.
Other very useful examples that I use in my day to day are the following: SMTP configuration (mail server used in local and production), API data that we use, etc ...
Have you already installed it? What are you waiting for?